

close
Choose Your Site
Global
Social Media


Views: 0 Author: Site Editor Publish Time: 2026-11-13 Origin: Site


Taking delivery of a new vessel is a high-stakes transaction. The balance of leverage shifts the moment you sign the final paperwork. The excitement of delivery day often obscures critical defects. Rigging errors or missing components easily go unnoticed in the rush. You might overlook poor wiring or unsealed hardware during a quick walkaround. A rigorous, objective final inspection prevents immediate warranty claims. It minimizes operational downtime before leaving the dealer lot. We will show you exactly what to check before accepting the keys. You will learn how to verify documentation, inspect structural integrity, and evaluate mechanical systems. We also cover electrical testing, trailer alignment, and the mandatory sea trial. Use this guide to ensure your vessel meets all safety specifications. Protect your investment from day one. Let us dive into the critical steps you must take.
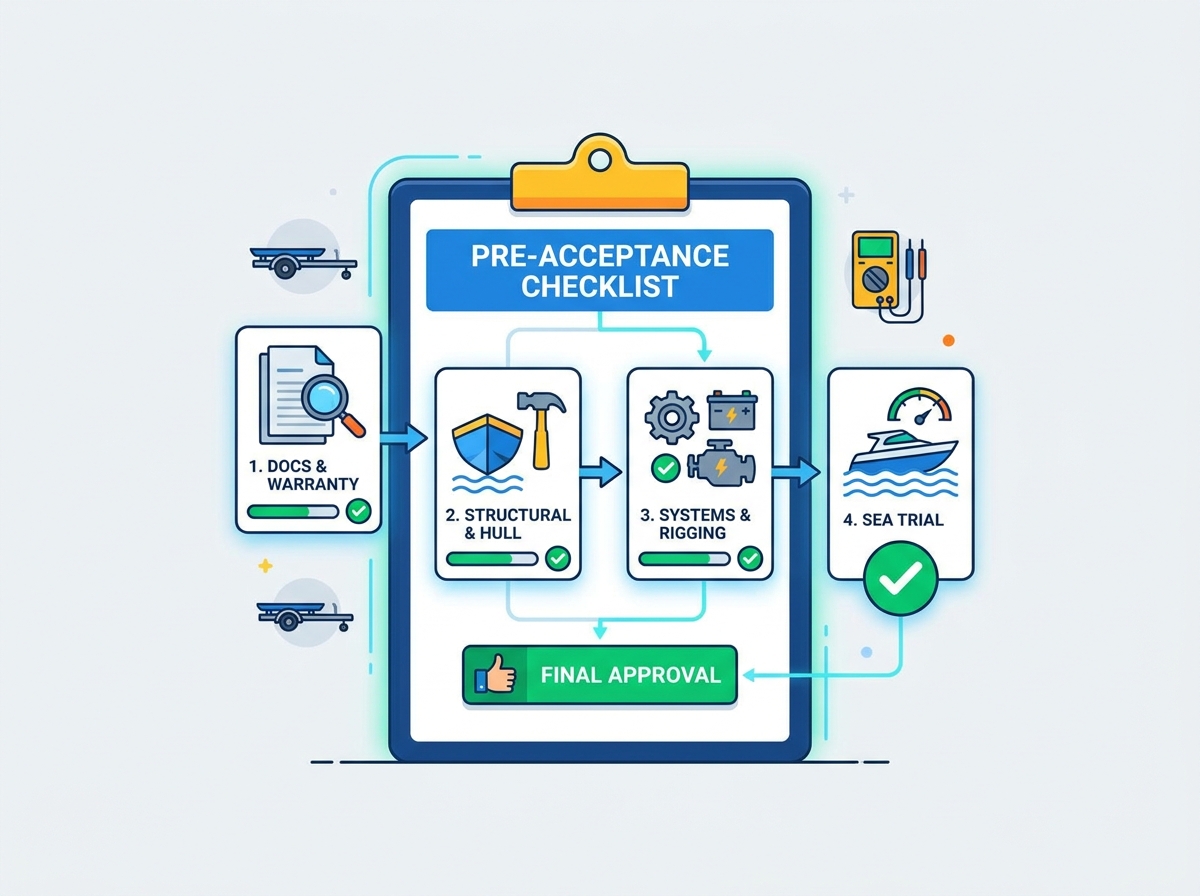
Verify all legal and warranty documentation: Cross-reference Hull Identification Numbers (HIN) and engine serial numbers with your purchase agreement to ensure valid warranty activation.
Conduct a structural and mechanical audit: Scrutinize hull integrity, hardware bedding, and plumbing pathways regardless of whether the vessel is factory-direct or dealer-rigged.
Stress-test electrical systems: Demand a physical demonstration of all electronics, battery configurations, and pump switches prior to signing.
Mandate a pre-acceptance sea trial: Static inspections cannot reveal hydrodynamic issues, prop ventilation, or under-load mechanical failures.
Assess trailer alignment: Ensure the transport system is correctly fitted to the specific hull weight and dimensions to avoid structural damage during transit.
Ensuring legal compliance upfront prevents disastrous post-sale disputes. You must confirm final cost alignments before driving off the lot. Paperwork errors happen frequently during busy delivery seasons. These administrative mistakes can void factory protection or delay state registration.
Match the Hull Identification Number (HIN) on the starboard transom directly against your final invoice. Check this alphanumeric code against your title applications. You must also verify engine serial numbers and the trailer Vehicle Identification Number (VIN). One mismatched digit can create immense legal headaches later. Dealerships print stacks of paperwork quickly. You hold the responsibility to catch typos before signing.
Audit the physical boat against your detailed build sheet. Dealerships often install itemized options after factory delivery. Confirm they installed upgraded electronics exactly as negotiated. Check for specific trolling motors, custom canvas enclosures, and premium seating packages. Do not accept verbal promises for missing accessories. Require written "due bills" for anything absent.
Confirm the dealer submitted your warranty registration to the manufacturer. Some factory warranties require immediate activation upon delivery. Review specific limitations regarding dealer-installed accessories versus factory parts. A dealer installing a third-party accessory might not carry manufacturer backing. Ask for physical copies of all warranty terms. They serve as your primary defense against early component failures.
You must verify manufacturing tolerances and material integrity before acceptance. A pristine exterior ensures long-term durability. Dealerships often wash vessels before delivery. A shiny exterior can easily hide factory blemishes or transit damage.
Inspect fiberglass gelcoat integrity closely. Examine the hull under varying light angles. Look for stress cracks, spider webbing, or air voids. Blisters often appear around the transom, lifting strakes, and the bow eye. These areas endure high stress during transport and operation. Gelcoat anomalies indicate underlying laminate issues. Reject vessels showing structural spider cracking.
If you are accepting an aluminum fishing boat, closely examine the fabrication quality. Check the consistency of continuous welds along the seams. Look for properly seated rivets along the hull. Examine the chines for any signs of metal distortion. Check for incomplete paint adhesion or bubbling finishes. Bare metal exposure leads to rapid galvanic corrosion in marine environments.
Follow these numbered steps for a systematic exterior inspection:
Walk the entire perimeter looking for docking scuffs or rub rail damage.
Inspect all thru-hull fittings for proper marine sealant application.
Check cleats, rod holders, and grab handles for secure mounting.
Examine the transom engine mounting area for gelcoat compression.
Test all hatches for flush alignment and secure latching.
Ensure marine sealant remains visible where hardware penetrates the hull. Proper bedding prevents water intrusion into the inner core. Core rot destroys structural integrity over time. Loose cleats or unsealed rod holders signal rushed factory assembly. Demand immediate resealing for any dry hardware installations.
Assessing system reliability ensures safety compliance and rigging cleanliness. The American Boat and Yacht Council (ABYC) sets specific guidelines for marine rigging. Your inspection must verify the dealer or factory met these standards. Poor rigging leads to catastrophic failures offshore.
Verify the transom and engine mounting setup first. Engine mounting bolts must be properly torqued and fully sealed. Look for appropriate weight distribution plates backing the bolts inside the transom. These plates prevent the engine from crushing the fiberglass core. Missing distribution plates indicate improper dealer rigging.
Test the steering and throttle response carefully. Turn the wheel lock-to-lock. Check for hydraulic binding, physical stiffness, or air trapped in the steering lines. Assess the throttle binnacle for smooth engagement. Shift into forward and reverse to feel the detent engagement. Stiff throttles cause docking accidents.
Inspect plumbing pathways and bilge access. Activate livewell pumps, aerators, and bilge pumps manually. Confirm all thru-hull fittings below the waterline utilize double stainless-steel hose clamps. Accessible seacocks are mandatory for emergency shutoffs. Cheap plastic fittings below the waterline present severe sinking hazards.
Component | Acceptable Standard | Warning Sign (Reject or Repair) |
|---|---|---|
Hose Clamps | Double stainless-steel clamps on all below-waterline hoses. | Single clamps or rusting galvanized steel clamps. |
Engine Bolts | Sealed, torqued, backed by aluminum or steel distribution plates. | Unsealed bolts, washers sinking directly into fiberglass. |
Seacocks | Bronze or Marelon construction, easily accessible by hand. | PVC valves, blocked access, frozen levers. |
Hydraulic Lines | Routed smoothly, protected from chafing, leak-free fittings. | Kinked hoses, fluid weeping at the steering cylinder. |
Ensuring power sufficiency guarantees safe current operations. It also supports future technology integration. Marine environments destroy poorly assembled electrical systems rapidly. You must evaluate the wiring before exposing the vessel to saltwater.
Verify battery configuration and capacity immediately. A reliable fishing boat requires dedicated cranking and deep-cycle house batteries. Check battery terminal covers for secure placement. Ensure marine-grade trays secure the batteries tightly. Loose batteries cause electrical shorts and potential fires under heavy wave impacts. Confirm the Cold Cranking Amps (CCA) match your outboard specifications.
Inspect the helm console and bilge for organized wire management. Wires should be loomed, properly supported, and free from potential chafing points. Marine wiring must use tinned copper to resist corrosion. Avoid accepting a vessel showing "rats-nest" wiring. Disorganized spaghetti wiring makes future troubleshooting impossible. It also indicates rushed manufacturing standards.
Perform these specific electronic integration tests:
Power up all multi-function displays (MFDs) and fish finders simultaneously.
Deploy and stow electric trolling motors to check bracket clearance.
Verify NMEA 2000 network connectivity between engines and displays.
Check transducer readings (listen for the clicking sound if testing on land).
Perform a VHF radio transmission test for weather channel clarity.
Turn on every light, pump, and accessory switch at the helm. Check the navigation lights, anchor lights, and courtesy lighting. Ensure the bilge pump manual override switch functions correctly. A faulty bilge switch creates life-threatening scenarios offshore.
Preventing transit damage requires a thorough trailer evaluation. Ensuring immediate towing safety protects you on the highway home. Dealerships occasionally pair vessels with undersized trailers to lower package prices. You must confirm the transport system matches your hull weight and dimensions.
Ensure proper hull-to-trailer alignment first. The vessel must rest evenly on the bunks or rollers. The transom must sit flush with the rear supports. An overhanging transom causes hull hooking over time. Hull hooking permanently deforms the running surface. It ruins hydrodynamic performance and top-end speed.
Inspect winch and transom tie-down installations. Check the bow roller fitment against the bow eye. The winch strap requires tight tension without fraying. Assess the angle of the rear transom straps. They must pull straight down to secure the stern effectively. Loose straps allow the hull to bounce against the bunks during transit.
Check the trailer hubs, tires, and lighting components. Verify trailer tire pressure matches the sidewall specifications. Ensure the dealer torqued the lug nuts properly. Look for bearing protectors like Bearing Buddies to keep water out of the hubs. Connect the trailer harness to your tow vehicle. Verify all running lights, turn signals, and braking systems function properly before hitting public roads.
The sea trial serves as the definitive pass/fail test for operational capability. Static inspections on a trailer cannot reveal hydrodynamic issues. You cannot detect prop ventilation or under-load mechanical failures on land. Never sign the final acceptance paperwork without a comprehensive water test.
Observe the hole shot and RPM range carefully. Evaluate the ability to get on plane quickly. Verify the outboard reaches its specified Wide Open Throttle (WOT) RPM range. The engine must achieve this without propeller blow-out or cavitation. Failure to reach WOT indicates improper propeller pitch or engine height rigging. It requires immediate dealer correction.
Monitor system diagnostics under load. Watch engine temperature, oil pressure, and alternator output on the digital gauges while running. Push the vessel through tight turns to test steering stability. Listen for abnormal harmonic vibrations from the prop shaft or engine cowling. Strange vibrations often indicate loose mounting hardware or misaligned components.
Assess static draft and water intrusion after the test run. Cut the engine and let the vessel sit in the water. Inspect the bilge compartment thoroughly. A completely dry bilge is the mandatory standard. Any water intrusion dictates an immediate rejection. Do not accept the keys until the dealer sources and repairs the leak. A leaking brand-new vessel presents unacceptable safety risks.
Accepting delivery signifies your agreement that the vessel meets all quality standards. It confirms safety compliance and operational readiness. Do not succumb to dealer pressure to sign off quickly. Rushed deliveries always benefit the seller, not the buyer. Maintain objectivity throughout the inspection process.
Take charge of the delivery day timeline. Bring a flashlight, a notepad, and this inspection framework. If you find discrepancies, document them in writing on the acceptance form. Establish a strict timeline for rectification with the service manager. You hold the right to withhold final acceptance until the vessel becomes completely seaworthy. Ensure it aligns fully with your purchase agreement before towing it home.
A: While uncommon for small freshwater boats, hiring an accredited marine surveyor is highly recommended for complex, high-value offshore center consoles to identify factory defects the dealer may have missed.
A: Do not sign the final acceptance paperwork. Note the specific defects on a "due bill" or punch list, and require the dealer's signature committing to repairs prior to final payment or taking possession.
A: A proper physical inspection on land will take 1 to 2 hours, with an additional hour dedicated to the on-water sea trial. Do not schedule a delivery when you are rushed.
A: Reputable dealers will mandate a sea trial as part of their delivery process. If a dealer refuses an on-water test before final signature, view this as a major red flag and reconsider the transaction.


